Pickup locations (also known as drop points, buying clubs, or meet-ups) are a foundational component of your GrazeCart website. In fact, it is required that you have at least one pickup location set up before customers can start registering or placing orders.
How to Set Up a Pickup Location in GrazeCart
This guide walks you through the essential steps to create a Pickup Location in your GrazeCart store. While there are many advanced options available, this overview focuses on the minimum setup needed to get your first pickup location up and running.
Basic Setup Steps:
-
Navigate to Pickup Locations:
-
From your admin dashboard, go to Logistics → Pickup Locations.
-
Click Add Pickup Location (top right).
-
-
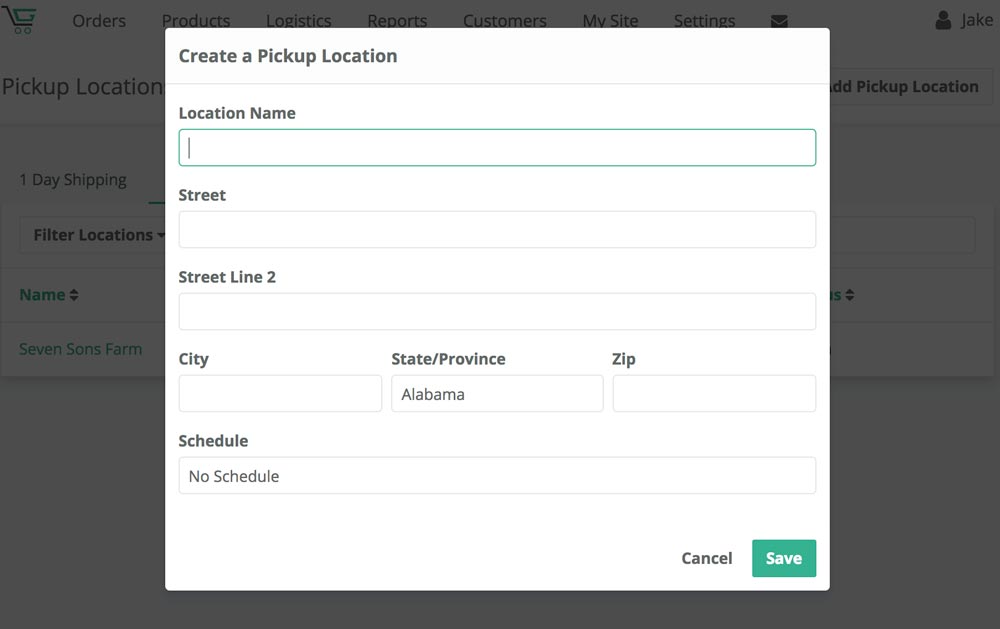
Enter Basic Details:
-
Name your pickup location.
-
Enter the address.
-
(Optional) Assign a schedule if one is available — otherwise, you can do this later.
-
-
Save your changes.
Available Settings Tabs:
Once the location is created, you’ll see several settings tabs:
-
Description:
Add a description for the pickup location. This will appear on the dedicated landing page for that location on your storefront. You can also add a contact name and information here. -
Pickup Times:
List available pickup times, separating multiple time slots with commas or line breaks. -
Address:
Update or edit the pickup location address as needed. -
Fees:
-
Delivery Fee: Set either a flat rate or a per-pound fee.
-
Include in Tax Calculation: Toggle whether this fee is taxable.
-
Cap Delivery Fee: Optionally set a maximum delivery fee once an order reaches a specific amount (e.g., free delivery over $100).
-
Additional Fees: Add any extra flat rate fees for this location if necessary.
-
-
Settings:
-
Status: Keep as Open to accept orders. Setting to Closed will prompt customers to select a different location.
-
Tax Rate: Set the applicable tax rate for taxable products.
-
Order Minimum: Set a minimum order amount for this location.
-
Payment Options: Assign unique payment options if needed.
-
-
Display Messages:
Customize how messages and labels display at checkout and on the location’s landing page (e.g., changing “Delivery Fee” to another label).
Final Step: Assign a Schedule
The final essential step is to assign a schedule to this pickup location. If you haven’t created one yet, refer to the GrazeCart Schedule Setup video or documentation.
How to Close / Discontinue a Delivery Zone
Below is a video explaining the exact process we recommend for closing a zone and/or pickup location to provide your existing shoppers with a smooth experience.
*Note* Pick-up Locations can be deleted by selecting Logistics > Pick-up Locations & then selecting the trash icon.